-
 Making my series 5 into my dream plane
Hey guys, I recently (5 months ago) purchased a series 5 kitfox as my first airplane. I was (am) a low hour pilot with no tailwheel experience at the time, but after tons of researching and reading I knew a Kitfox was the plane for me. I found the plane on barnstormers and was instantly attracted to its equipment list. It was powered by the 912ul with Xtra High Compression pistons so we think it was right around 90-95hp. It had the IVO in flight adjustable prop with constant speed controller so the airplane was a real performer at sea level. Unfortunately for me my field elevation is over 5000ft and hot in the summer so its not uncommon to see density altitudes well over 8000. I quickly got the itch to start upgrading the plane and am now well under way.
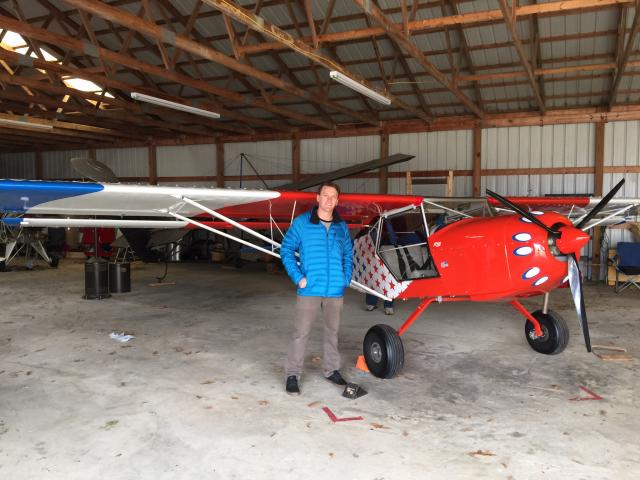
Here I am, the proud new owner of what I am calling the FreedomFox
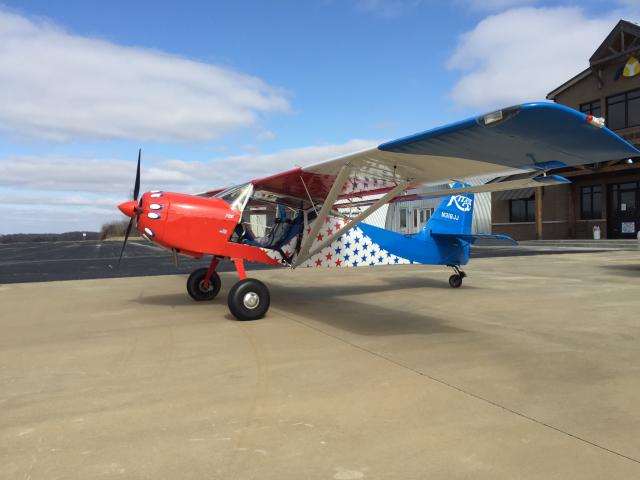
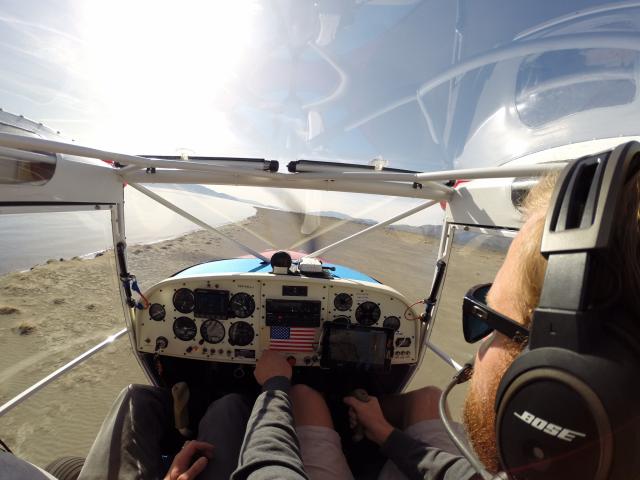
All fueled up and ready for the 23 hour flight home from Memphis to Reno
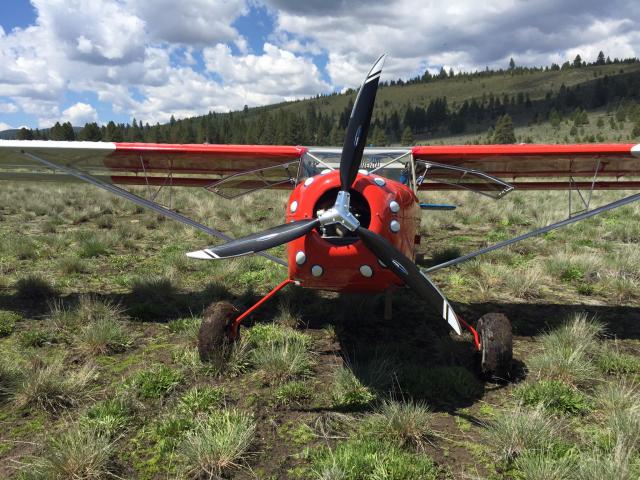
The first thing I ended up changing was the prop. Although I loved the performance of the IVO, it always had vibrations and the wiring wasn't perfect so I ended up with a fixed pitch much of the time (found the wiring issues upon removal of the prop... figures). I swapped to a whirlwind GA-70RW, I knew it was a little too much prop for the plane but planned on adding horsepower so I figured it was better to get the wide chord over the razor version. We pitched the prop for takeoff so I ended up losing a good 15-20mph in cruise, but man, this prop was SMOOTH!!!
This whirlwind prop is just beautiful!
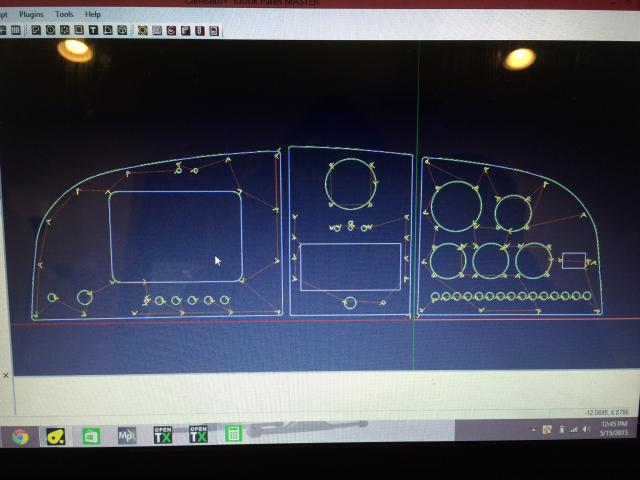
The next thing that had been bugging me was the panel. It had tons of gauges which is nice but also had a Dynon D-6 which was a 6 in 1, so many of my gauges were redundant. Also, I was using an iPad Mini for navigation and where the mount was for the iPad had it covering much of my engine monitor gauges and breakers, which wasn't ideal. Luckily I have a good friend with a CNC router so I ordered some carbon fiber plate and got on my computer and started drawing. I ended up using a flypad mount on the left side to hold my iPad mini, and mounted my steam airspeed indicator in the back of the mount (iPad covers it but in the event of a power loss or if the Dynon dies I will still have airspeed).
The old panel
As you can see with the iPad mounted it turned into a vary clustered panel
Out with the old

The old panel cutouts helped for measuring all the holes to be cut in the carbon

Ready to cut!
Faces mounted up and ready to go in the plane, rim painted black

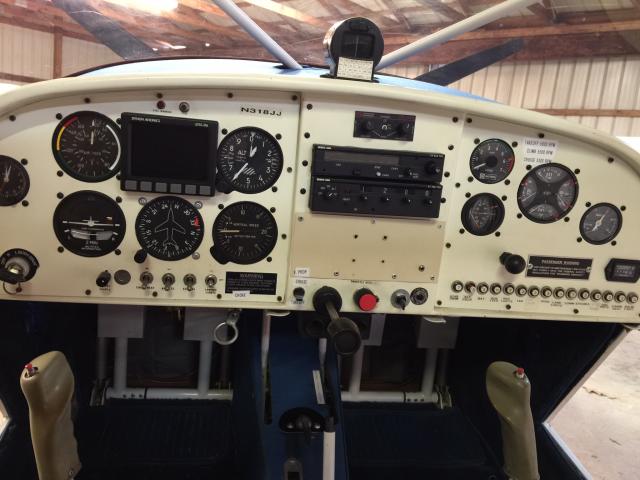
New panel is in! Here you can see where I put the airspeed indicator incase of a power out
With iPad mounted

While saving for more upgrades I decided to sell my other toy, my 2014 polaris RZR XP1000 which I had dumped way too much money into. By selling it I was able to get on the fast track to building my plane into my dream plane.
First thing I did was get on the phone with Hal and Jay with Zipper Big Bores and did a high compression big bore kit and slipper clutch. The plane already had a skytec starter so the slipper clutch was the only thing I needed to add aside from the big bore kit. Right away the performance was impressive. We had to add 2 degrees to the prop to keep it from over speeding, so I got back about 12mph in cruise. Also my ground roll was noticeably shorter and my climb was about 500fpm more  I have been getting about 1000fpm with two guys and full tanks at a density altitude of 7000ft
The new cylinders have a lot more fins giving better cooling properties

Size comparison from the original 80hp bore to the new bore
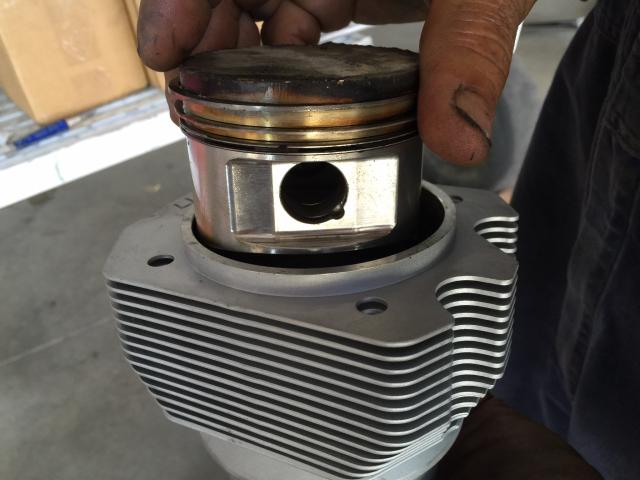
Pistons and cylinders mounted on the case

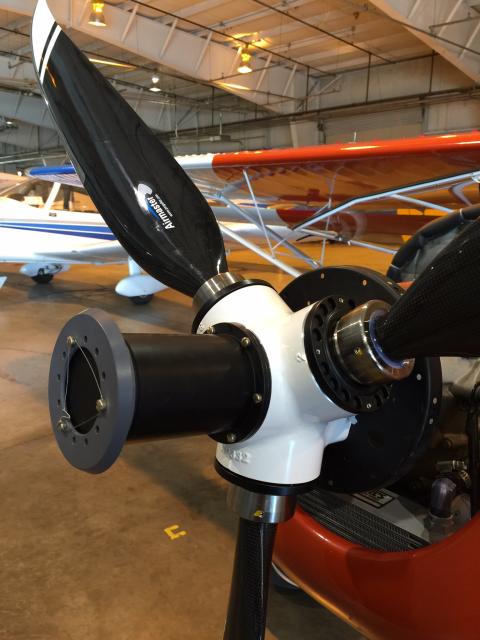
The next step was getting some cruise speed back without losing my climb performance, so the best answer was to go with an Airmaster propeller system with the whirlwind STOL blades on it (the first prop I bought was the speed cut). So before I knew it I had just dumped another $8k into a prop!  The Airmaster systems are all custom built per order so it took about 2 weeks for them to build my system and then another week to ship from New Zealand. Which was actually nice because it gave me some time to get a feel for the performance with the big bore before adding the air master.
Out getting my tires dirty
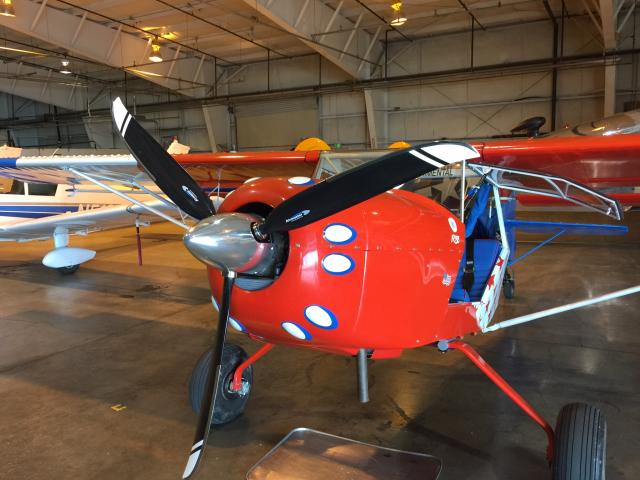
The Airmaster arrived last week and I was finally able to find time to install it yesterday. I am going to have it weighed for a new W&B. I figured there has been so much done to this plane since the last time it was weighed that now is probably a good time to do so, especially since I am adding 18lbs to the nose. The install went very smooth, I am absolutely blown away by the quality of the Airmaster, especially after having dealt with the IVO constant speed setup, this was the real deal.
Constant speed hub
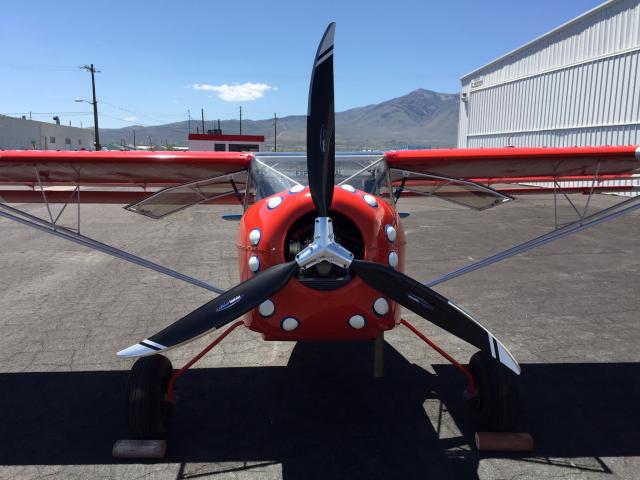
The air master really looks good on there
Fully feathered

At the time of writing this I am waiting to get the plane in to get weighed before I go fly it. I am very excited to see the results. I will be sure to post my thoughts after I get it flying.
Next thing on my list is 26in bushwheels!
Tags for this Thread
 Posting Permissions
- You may not post new threads
- You may not post replies
- You may not post attachments
- You may not edit your posts
-
Forum Rules


 Reply With Quote