Kitfox Aircraft Stick and Rudder Stein Air Grove Aircraft TCW Technologies Dynon Avionics AeroLED MGL Avionics Leading Edge Airfoils Desser EarthX Batteries Garmin G3X Touch
Page 3 of 6 FirstFirst 123456 LastLast
Results 21 to 30 of 51

Thread: Bringing a Model 1 back to life

  1. #21
    Senior Member
    Join Date
    Apr 2009
    Location
    Chisholm Mn
    Posts
    1,575

    Default Re: Bringing a Model 1 back to life

    Ouch. I'm not a metal specialist or anything, but corrosion on a spar seems pretty scary. Are your spars just round tubes, or do they have a verticle section going down the center? Here is a picture showing the type with the verticle stiffener. I would think these are stronger, and would maybe be less worried about them then the regular round tubes. JImChuk

    PS. I guess I couldn't up load the picture

  2. #22

    Join Date
    Aug 2018
    Location
    Anchor Point, AK
    Posts
    28

    Default Re: Bringing a Model 1 back to life

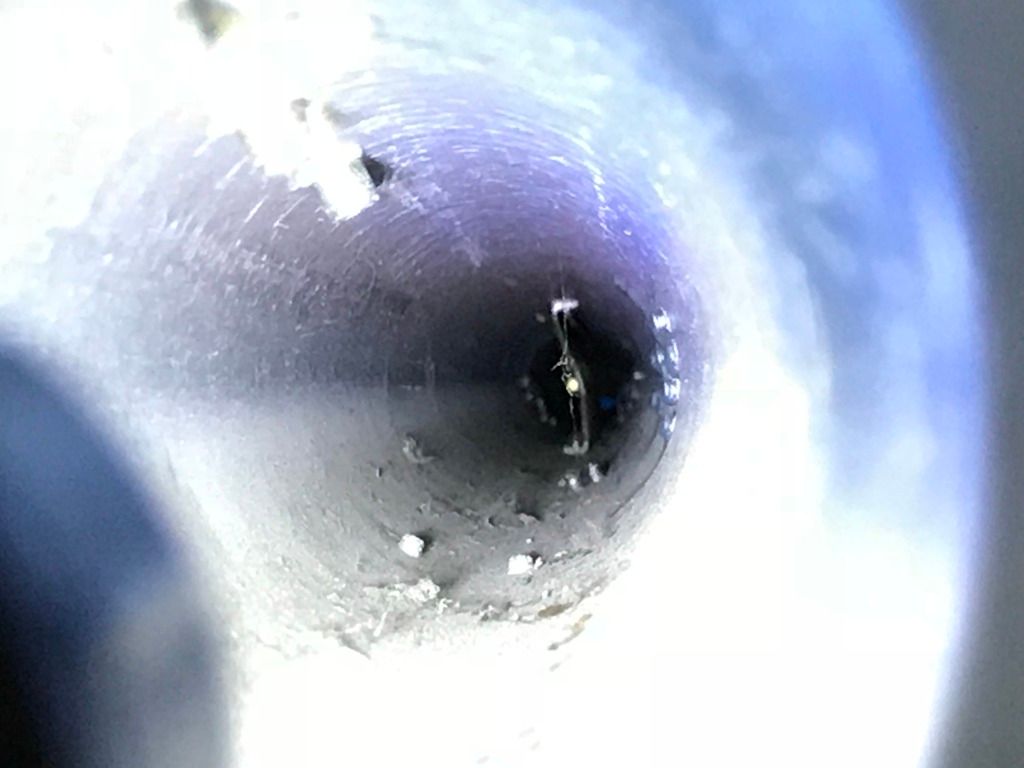
    The spars on the model 1 are reinforced with Z-metal, rather than the extruded I-beams of later models. You can kind of see it in the pic. The light spot is light shining in the other end of the spar. Hard to get a good picture of the middle of the spar. That is a partial length reinforcement. The Model 2 used a full length I-beam, and Model 3 went back to a short section, but lengethened the lift struts. I posted pictures of the description of model improvements and gross weight increases from Model 1 to Model IV 1200. Hopefully the pics are readable. It’s good info.

  3. #23

    Join Date
    Aug 2018
    Location
    Anchor Point, AK
    Posts
    28

    Default Re: Bringing a Model 1 back to life

    I think the coatings were good. It could have gotten moisture in from the holes on top, but they were taped up pretty good. Also, if it was water coming in a hole, the spot nearest the hole would be worse than the rest. You can see the wavy line of oxidation where the fabric of the underside of the wing was wrapped up around the spar. It seems evident that either the fabric was wicking moisture, or the cement had corrosive properties. Since the cement was on other areas that did not seem affected by corrosion, I’m ruling that out. Also, there has to be a reason that the left wing was worse than the right. I’m pretty sure it’s from condensation. The wings heat up a lot in the sun. I could feel the heat coming out of the hole in the wing, yesterday, with the sun shining on part of it. Hot air holds much more moisture than cold air. So, on a cold day, that hot air is sucking up moisture like a dry sponge. Then, when the sun goes down, there isn’t enough air flow to evacuate the moisture from the wings, and it condenses on the bottom of the inside of the wing. The reason the left wing is worse, is because it wasn’t sealed up as tightly, allowing more moist air to enter the wing. It has that unusual storage compartment with the open end and short ribs and slats of plywood holding the fabric out, allowing airflow to the rest of the wing.

  4. #24
    Senior Member efwd's Avatar
    Join Date
    Jun 2015
    Location
    Yorba Linda, CA
    Posts
    2,823

    Default Re: Bringing a Model 1 back to life

    I suppose that is the photo that will explain the answer to the frequently posted question. Should I epoxy primer the spars?
    Eddie Forward
    Flying
    SS7, 912iS, Garmin G3X

  5. #25

    Join Date
    Aug 2018
    Location
    Anchor Point, AK
    Posts
    28

    Default Re: Bringing a Model 1 back to life

    The good news is, I’m able to scuff the spars clean with Scotch Brite, and they’re nearly perfect. Virtually zero pitting. I did find some file marks that I don’t like, but it obviously held up with those for the last thirty years, so I’m not going to worry about that. I’ll get these cleaned up and etched, and I will definitely be epoxy priming them, as best I can, without breaking it all apart.
    I need to measure the wing twist and order tanks. I think the benefit of added fuel capacity will outweigh the additional weight of the tanks. I’ll see what the weight is, when I call them. I do intend to keep the weight as low as possible, so I can actually bring a passenger without being over gross.

    Matt

  6. #26

    Join Date
    Aug 2018
    Location
    Anchor Point, AK
    Posts
    28

    Default Re: Bringing a Model 1 back to life

    And... wing tanks are ordered. She said it would be three or four weeks. I’d better get the fabric ordered up. She asked about a header tank, and I don’t have one. I’m really not interested in adding more fuel capacity or weight, at this point. I should be able to tee them into the fuel line below the panel tank, like the old wing tank. I’ve read about the feed issues that people have had with wing tanks. Is there a preferred solution to that? In trying to drain my wing tank, I found that it didn’t empty until I gave the tank a little positive pressure, then it kept flowing into the panel tank. I’d prefer it to gravity feed, without question.

  7. #27
    Senior Member Esser's Avatar
    Join Date
    Jul 2011
    Location
    Edmonton, AB
    Posts
    2,048

    Default Re: Bringing a Model 1 back to life

    You’ll want a header tank or you can starve your self of fuel if your nose is pitched down for a couple minutes....
    ------------------
    Josh Esser
    Flying SS7
    Rotax 914iS
    AirMaster Prop

    Edmonton, AB, CWL3

  8. #28
    Senior Member rv9ralph's Avatar
    Join Date
    Aug 2014
    Location
    Greenleaf, ID
    Posts
    620

    Default Re: Bringing a Model 1 back to life

    Adding to Josh's comment, the header tank is only about one gallon, but it will keep the engine fed when defending and the fuel pickup in the wing is unported. The header tank is usually mounded behind the seat and both tanks feed into it.

    Ralph

  9. #29

    Join Date
    Aug 2018
    Location
    Anchor Point, AK
    Posts
    28

    Default Re: Bringing a Model 1 back to life

    It seems to me that I could set it up to refill the panel tank from the wing tanks, and only run off the panel tank.. What if I tee’d into the fill neck, or somewhere on top of the panel tank, and let the wing tanks feed into it, rather than connecting to a tee below the panel tank? The old wing tank connected to a tee below the panel tank, and, to the best of my knowledge, it worked like that. I wouldn’t want to run directly off the wing tanks, understanding the risk of unporting the pickup tube, and sucking air. As I understand it, the wing tanks get some positive pressure from airflow into the cap vent? I could shut off the wing tank valves when the panel tank filled, so it didn’t overfill. Fuel level is visible in the panel tank, so there shouldn’t be an issue of starving for fuel.

  10. #30
    kitfoxjim's Avatar
    Join Date
    Dec 2010
    Location
    Calgary, AB
    Posts
    38

    Default Re: Bringing a Model 1 back to life

    Your problems bring back some memories of a cross Canada flight I made in my Model 2 back in the early 90's. I have one wing tank and the panel tank.
    When I would open the fuel valve to fill the panel tank flow would not start while in the air. I learned that I could land, taxi to a stop, then the fuel flow would start. After take-off the fuel flow would continue to fill the panel tank.
    This was done several times during the cross-country anywhere I could find suitable space for a stop-and-go. My plumbing from the wing tank and is teed to the connection at the bottom of the fuel tank. After I returned home a facet pump was installed in the line to start the fuel flow. It is only needed to start the fuel transfer, but can be left on to speed things up. Do not forget to shut off the fuel valve before the panel tank overflows!
    Jim Corner
    KF2 582 1150 hrs
    KF5 O-360 1150 hrs

Tags for this Thread

Posting Permissions

  • You may not post new threads
  • You may not post replies
  • You may not post attachments
  • You may not edit your posts
  •